
Welcome to our guide on Checklists. ✅
Checklists on Dines give you an easy way to create repeatable lists of tasks for your team to work through and sign off.
Opening and closing procedures, food hygiene checks, fridge temperature checks or anything else can be covered with these. If there are jobs that need to be completed regularly, you can turn them into a Checklist and keep a record of exactly what was done, when, and by whom.
In this guide, we’ll show you how to create your first Checklist, add tasks for your team, and complete them through a browser or the Dines for Venues app.
How Checklists Work
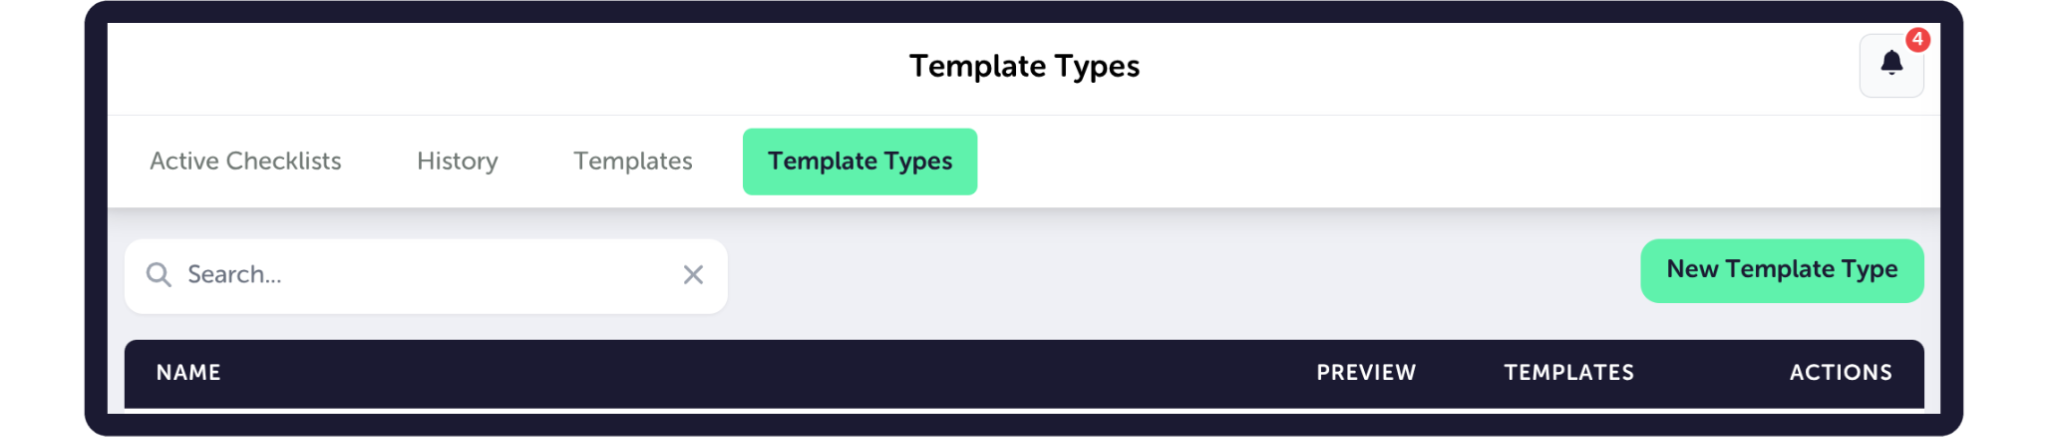
When you navigate to Checklists on the Dines Dashboard, you will see four tabs at the top of the screen; Active Checklists, History, Templates, Template Types.

Before starting your first Checklist, you’ll need to create a Template Type, followed by a Template. For clarity, a Template Type is the broader category your Checklist belongs to (e.g., Opening Procedures). A Template is the actual Checklist your team will work through (e.g., Weekday Opening Checklist). And Linked Tasks, which we’ll get onto later, is the individual jobs within that Checklist (e.g., Turn the Lights on, or Check Fridge Temperature).
So with all that in mind, we’ll be working in this order: Template Type > Templates > Active Checklists
Now that that’s all cleared up, let’s build our first checklist.
Creating a Template Type
First, click on the “Template Type” tab at the top of the page. Then, select “New Template Type” at the top right.
An overlay window will appear, giving you a few options to customise your Template Type. You can give it an easily identifiable Name, a Description, and a Theme Colour. To give an example for this article, we will name ours “Opening Procedures,” with a Description of “Checklists for getting the venue ready to open.”
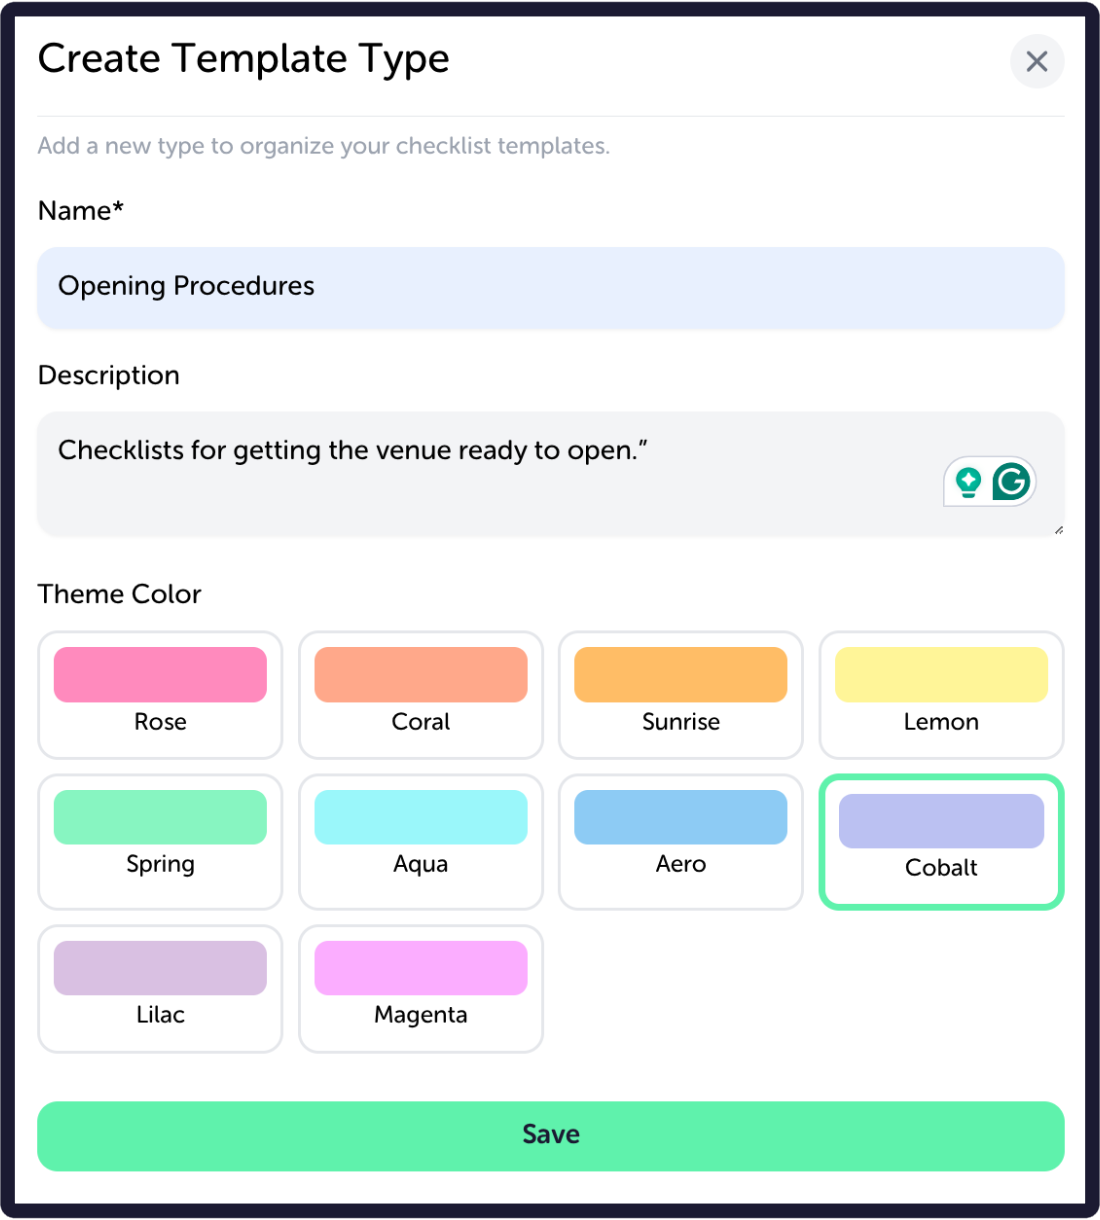
Note: A Description is not mandatory, but can be handy if you end up creating several different types of Checklists.
Finally, set your preferred colour, and click “Save” at the bottom of the screen. Your template has now been created, and can be edited at any time by clicking the “Actions” drop-down at the right-hand side of the screen.
Creating a Template
Now that our Template Type exists, it’s time to create the actual Checklist.
Head to the Templates tab, and select “Create New Template” at the top right.

You’ll be asked for three things;
- Name: The name of the Checklist itself
- Template Type: The broader category that you created in the previous step
- Description: An optional explanation of what the Checklist is for
Fill these in, and then once you’re happy, click “Save.”
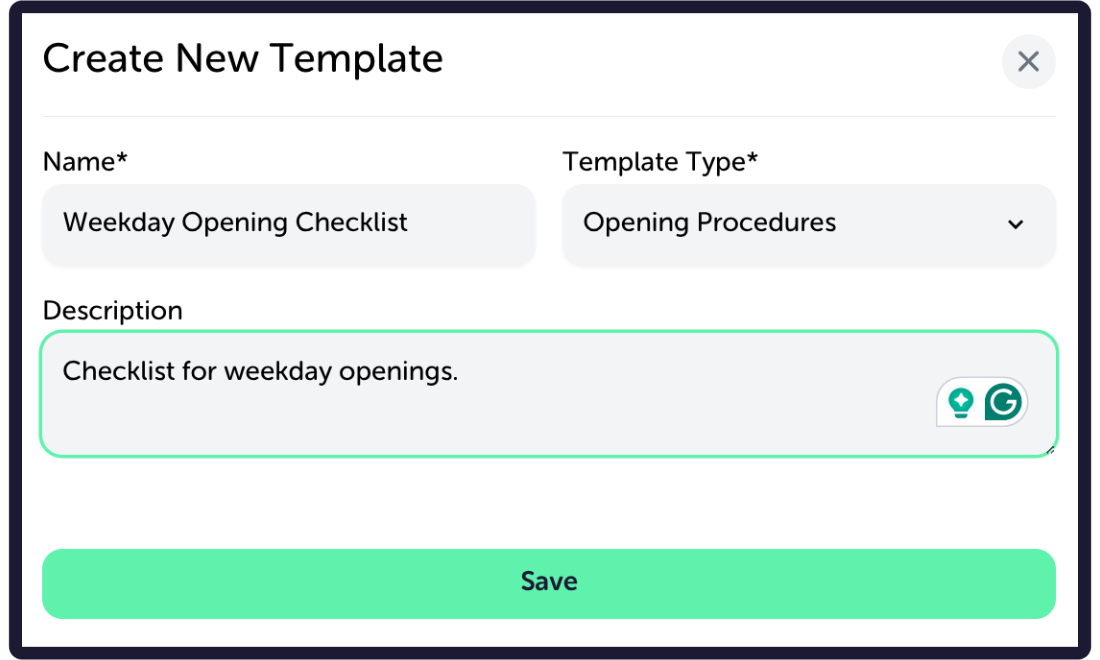
You will now be taken to your new Template, where you’ll see two tabs: Details and Linked Tasks. The Details tab is what you’ve just filled in, so we’ll move straight onto the important bit: adding tasks!
Adding Tasks to a Checklist
Select the Linked Tasks tab, and then click “Add Task” at the top right.
You’ll see that each task has four options;
- Task Name: The job that needs to be completed.
- Order: Determines where the task will appear in the Checklist. Ranking at number 1 will make the task appear first, 2 will appear seconds, and so on…
- Required: Choose whether the task absolutely needs to be completed
- Notes: Add any extra information that may help the person completing the task
We’ll pop an example of a task below.
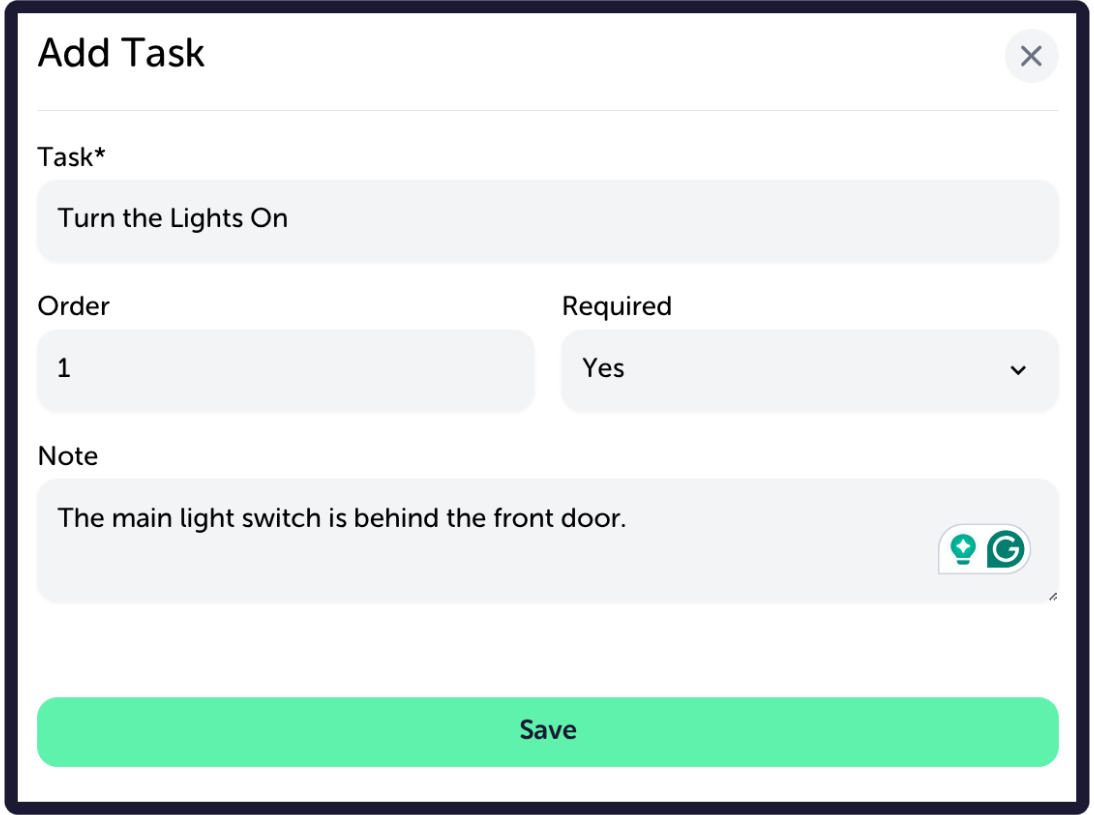
Once you hit “Save,” your first task will be linked to the Checklist. You can proceed to add as many tasks as you wish by following the same instructions. When you’re done, your Template may look something like the below;
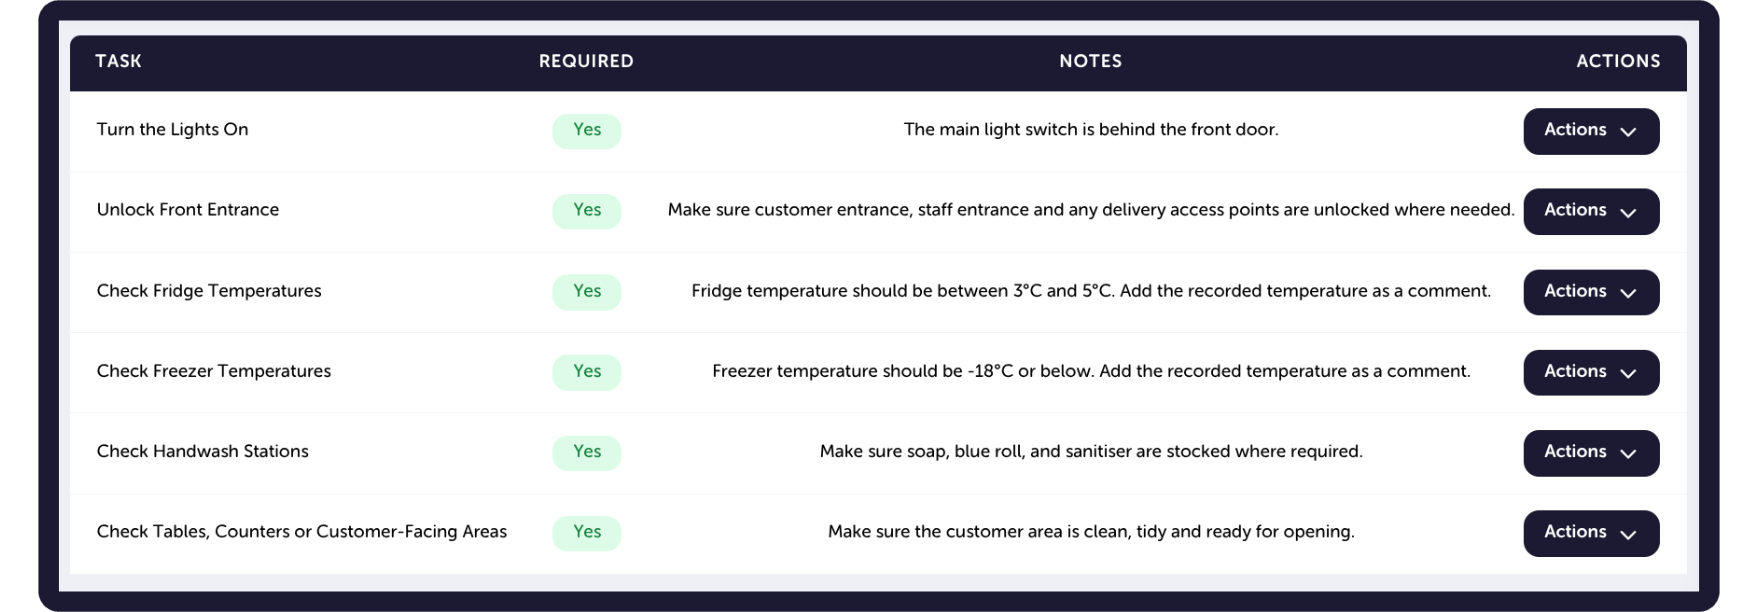
Now, click the “Home” icon at the top left. This will bring you back to the homepage of Checklists, where we can now use the Checklist that we’ve just created.
Starting a Checklist
To start a Checklist, head to the Active Checklists tab, and choose “Start Checklist.”
You’ll be asked to select one of your existing Templates. In our case, we’ll choose the “Weekday Opening Checklist” from above.
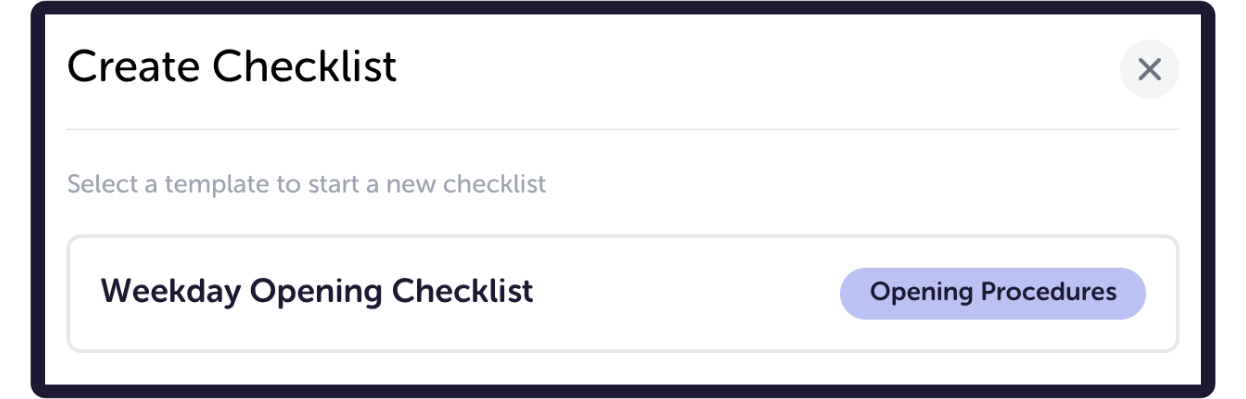
The Checklist will then open, ready to be worked through.
You can do this from your Dines Dashboard on a browser, or through the Dines for Venues app by heading to Settings > Account > Checklists > Active Checklists.
Please Note: Only the Active Checklists tab is currently visible on the Dines app. Templates, Template Types and History will need to be viewed from the dashboard.
Completing Your Checklist
Now that our Checklist is active, it’s time to work through it.
Each task will show its Name and any Notes that were added when the Template was created. You can also add a Comment to any individual task. For example, when completing our “Turn the Lights On” task, we may notice a problem and add the following comment;
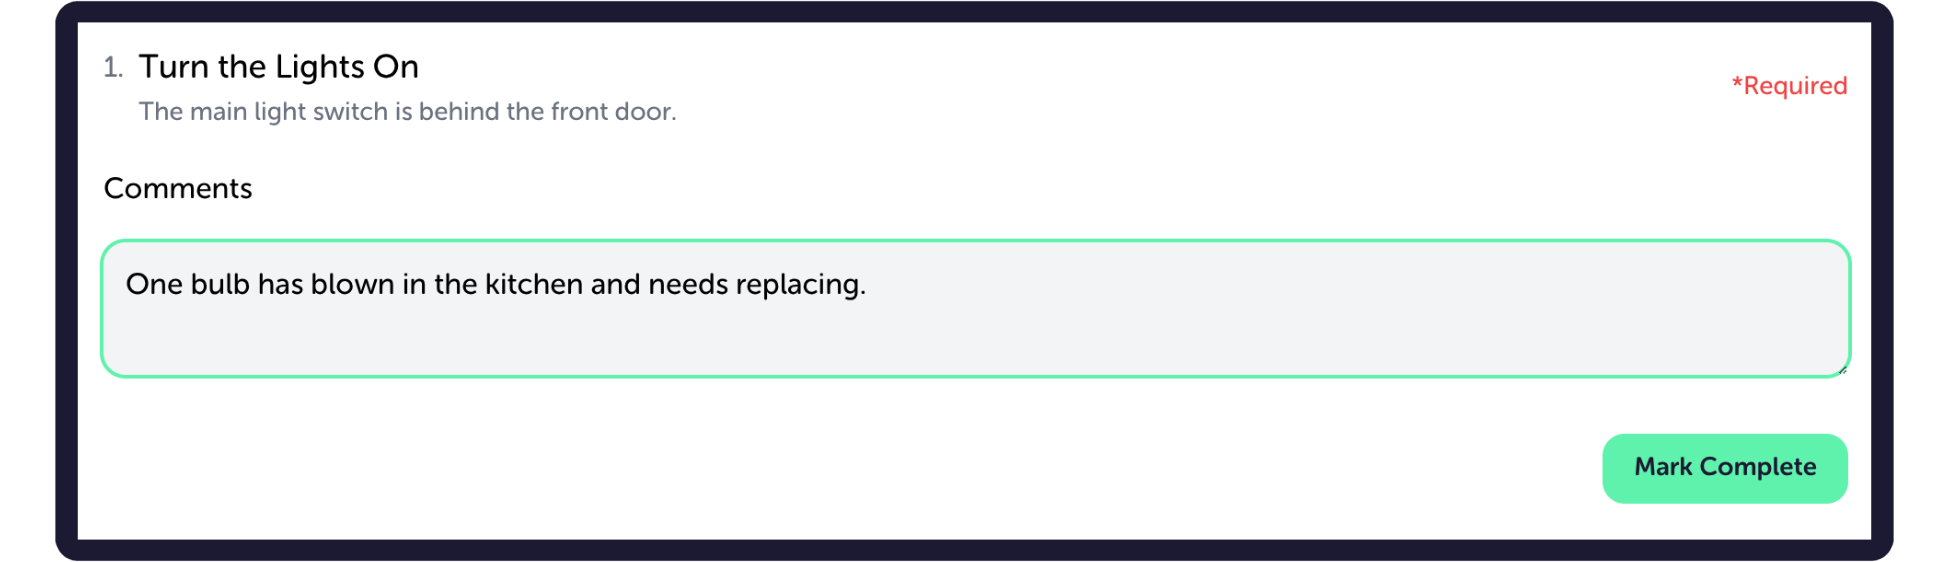
Once the job has been done, select “Mark as Complete.” A tick will appear beside the task to confirm that it has been completed, meaning you can now move on to the next one.
When you have completed all tasks, you’ll see that there is a “Comments and Notes” section at the bottom of the Checklist. This can be used for broader observations, issues, or anything else that somebody may need to know about the Checklist as a whole. For example: “Fridge 2 display broken. Temperatures taken with probe.”
If you’ve added any notes, make sure to click “Update Comments” to save them.
Now it’s time to finish the Checklist! At the bottom of the page, you’ll see your overall progress (e.g., “6 out of 6 tasks completed”), and the “Complete” button. Select that when you’ve completed everything required of the Checklist.
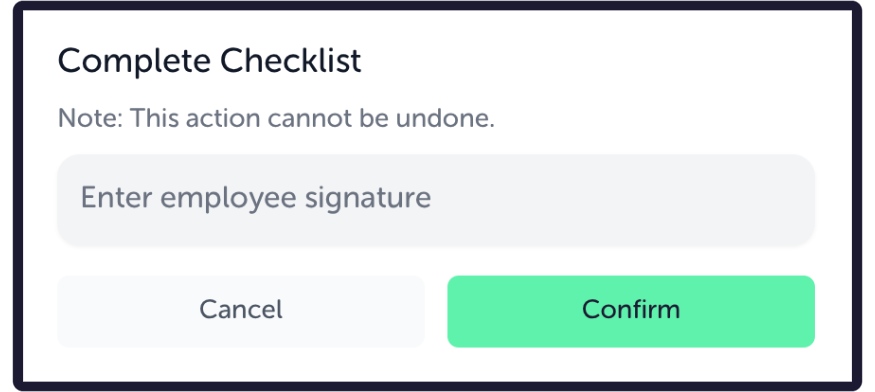
The final step will appear in an overlay window, where you’ll be asked to enter an employee signature. Simply input your name and select “Confirm.”
And that’s everything - your Checklist is now complete. Once completed, it will disappear from Active Checklists and move into your History tab.
Checklist History
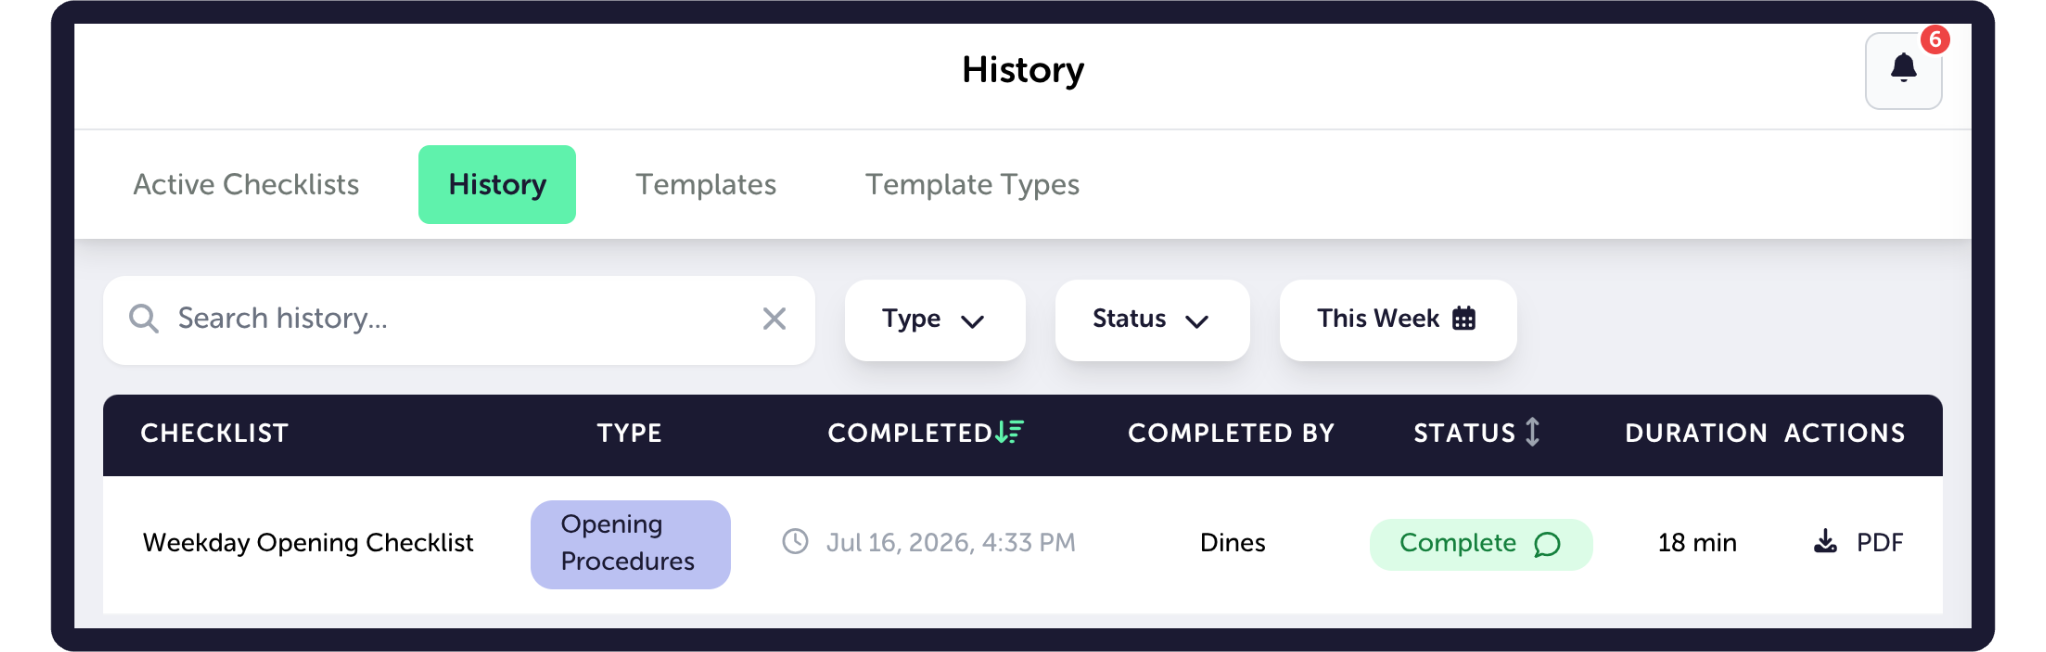
On the History page, you’ll see every Checklist that has been completed, as well as some handy information about the Checklist itself. This gives you an ongoing record of what your team has completed, without needing to keep paper copies of every Checklist. You can also use the search bar and toggles at the top to filter your results, so that you can easily find Checklists that were completed some time ago.
Clicking on any Checklist opens it and shows further details, such as Notes left on each Linked Task, and Comments left for the Checklist as a whole.
If you do need a separate copy, you can also download any completed Checklist as PDF from the History tab. Simply find the Checklist you want, and see the PDF download option on the right-hand side. The PDF will provide a record of the completed Checklist, including the Tasks, Comments, dates and timestamps.
And that’s everything. Thank you for reading through our guide on Checklists.
If you have any questions or feedback at all, or if there is a particular Knowledge Base article you’d like to see, please get in touch. You can reach us via email at care@dines.co.uk, or use our Live Chat and WhatsApp support services by clicking here.