
Organisation Dashboard
Welcome to our guide on the Dines Organisation Dashboard. 👋
The Organisation Dashboard is a great way to manage multiple accounts at once on Dines.
It’s particularly useful if you operate across multiple venues or events. With an Organisation Dashboard, you can view sales and reports for each account separately, while also combining accounts to see overall performance across your organisation. On top of this, you can assign and edit menus on each account remotely, view Past Orders, and monitor device activity across all connected accounts.
Follow our guide below to learn how to use the Organisation Dashboard and it’s key features. 👇
How Do I Get An Organisation Dashboard?
First thing’s first - you’ll need an Organisation Account to get started.
Organisation Accounts are a feature that we have to enable for your business. To request one, please email care@dines.co.uk from the email address associated with your primary Dines account, and we’d be delighted to set one up.
Once your Organisation Account is ready to go, you’ll be given full access to the Organisation Dashboard.
How Do I Access My Organisation Dashboard?
Key Tip: The Organisation Dashboard is separate from the standard Dines Dashboard used for individual accounts. That means you’ll need a different link to access it.
Once your Organisation Account has been set up by our team, you can access the Organisation Dashboard by using the link below:
https://organisation-dashboard.dines.co.uk/
Here, you can login using the Organisation Account credentials that we provide you with. And that’s the final step, you’ll now have access to everything the Organisation Dashboard has to offer.
Linked Accounts
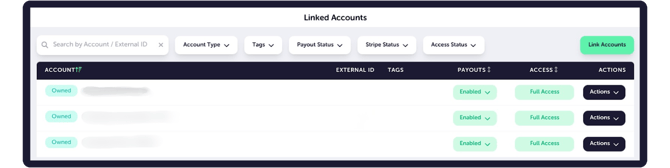
Now that you have logged into your Organisation Dashboard, the first thing you’ll see is a list of Linked Accounts.
This includes all of the accounts that are linked to your Organisation Dashboard, which are accounts you own, as well as any 3rd Party accounts you’ve been given access to.
Each row represents a single linked account. Here is a breakdown of what each heading on this list means;
Account: Shows the account name, and whether it is Owned or 3rd Party. Owned accounts are businesses you own and control. 3rd Party accounts are businesses you’ve been given access to, such as trader accounts linked to a festival or event you are running.
External ID: This is an optional identifier used to help distinguish the listed accounts. For example, perhaps as a festival operator, you have multiple areas where traders operate. In that scenario, the External ID may be “Area A, Stall 2.”
Or, maybe you run a business in multiple locations, so the External ID could be “Edinburgh” or “Liverpool.”
If you would like External IDs added to the accounts here, just let us know and we’ll make sure it’s done.
Tags: Similar to the above, Tags are another way to group and identify accounts. If you are a festival operator, you might find it handy to have tags such as “Burger Stall,” “Fish & Chips” or “Bar” as Tags, to quickly understand what each account represents. Tags can also be used as filters at the top of the page.
Payouts: This is a quick way of seeing whether payouts are enabled on the account. If this is showing as “Disabled,” it is very likely that the account has not added payout details on the regular Dines dashboard, or completed their mandatory Stripe Onboarding. More information can be found in this video here.
Access: This shows whether you have full access (e.g., if you are the owner of the account), or if your access as expired (e.g., if you are a third party checking after a festival has concluded).
Actions: The Actions menu allows you to generate a One-Time Passcode (OTP) for quick access to an account.
To use a One-Time Passcode, click “Create One-Time Passcode” next to the account you wish to access. This will then generate a 12-digit OTP code, as below. You can either copy this code to your clipboard, or view a QR code for speedy login.
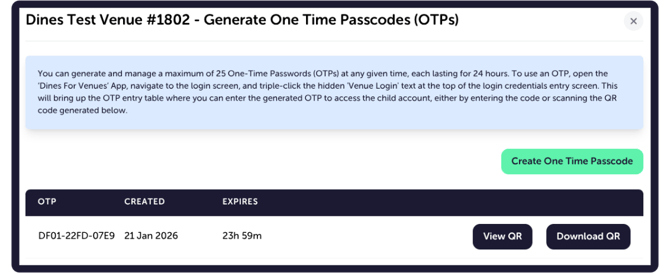
From here, you can login to the account using either;
- A Browser: By heading to the regular Dines Partner Dashboard, and clicking the “D” of “Dines Hospitality Operating System” on the top-left.
- An iOS Device: By opening the Dines for Venues app, selecting “Login,” and tapping three-times on the “Venue Login” heading at the top of the page.
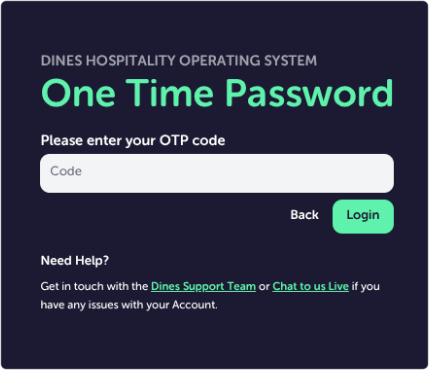
Both ways will open up a “secret” login page, like below.
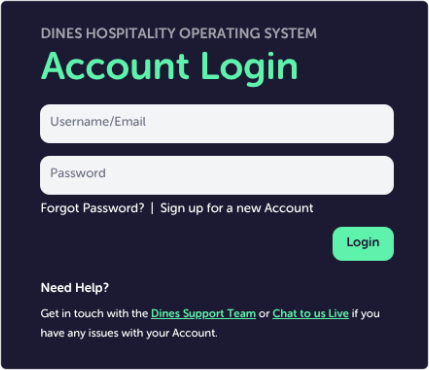
Here, you can log in using your OTP code, or if you are on an iOS Device, you can select “Scan QR Code” to scan the QR that appears on your Organisation Dashboard. Logging in via either method will take you directly into the selected account.
Note: Only “Owned” accounts have this capability. If your relationship with the account is 3rd Party, you will not be able to use a One-Time Passcode.
Along with all of these column headings, you can also filter the accounts that you can see, such as by;
- Account Type: “Owned” or “3rd Party”
- Tags: As described above, if you have the Tags present, you can choose to see only Bars, or only Restaurants for example.
- Payout Status: Check whether their payouts are enabled or disabled.
- Stripe Status: Shows how our payment processor Stripe has marked their account, whether this is completed, enabled, pending or restricted.
- Access Status: As above, this can filter by accounts you currently have access to, will soon have access to, or ones where access has expired.
Global Menus
With Global Menus, you can create one menu that can be pushed out to multiple accounts. This removes the need to manually recreate the same menu across several accounts. Instead, you can create the menu once, and then link it to any child account that is already linked to your Organisation Dashboard.
To do this, simply login to your Organisation Account via the regular partner dashboard (not the Organisation Dashboard), and add your menu as per our guide here.
Note: If you would like help with creating your menu, please don’t hesitate to get in touch.
Now that your menu is added, jump back onto your Organisation Dashboard, and select the “Global Menus” option on the left hand-side. Then head to “Add Menu,” which will show a page with three headings; Details, Categories and Accounts.
- Details: Enter the Name of your menu, the Order you wish for it to appear in (0 being “first” on a list of multiple menus), and a Description of what the menu is (e.g., “New Dinner Menu”).
- Categories: Here, you can choose which Categories to add to your menu. Simply select each Category by clicking the box on the left, and then choose “Link” at the bottom of the page.
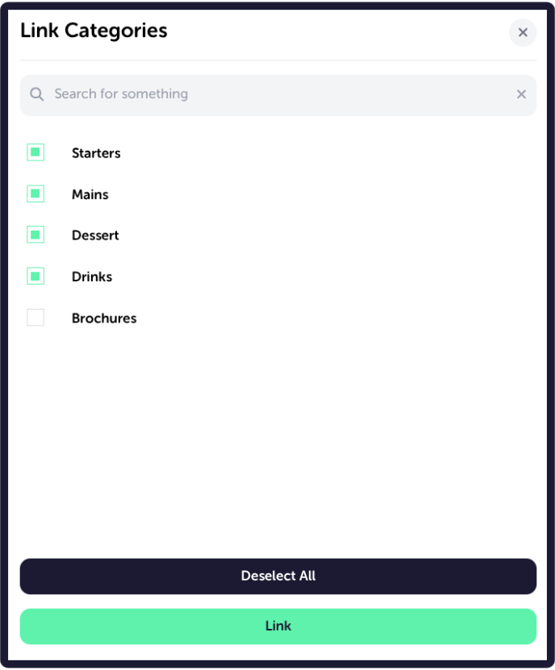
Accounts: The final step is to choose which accounts you wish to send this menu to. Here, you’ll see a list of accounts associated with your Organisation Dashboard. Select the relevant accounts, choose “Link” at the bottom, and don’t forget to hit “Save” to make sure everything has synced correctly.
From here, menus will appear on the linked accounts as Device-Specific Menus. To activate this, login to the account on an iOS device (iPad or iPhone), and navigate to Functions (⚙) > Checkout Settings > Assign a Specific Menu > Select Your Menu. If you get stuck, check out the GIF below.
.gif?width=670&height=466&name=Device_Specific_Menu%20(1).gif)
Once assigned, the menu will appear on the device exactly as it was created on the Organisation Dashboard.
Past Orders
The Past Orders section shows all orders received through EPOS and Mobile Ordering across your linked accounts.
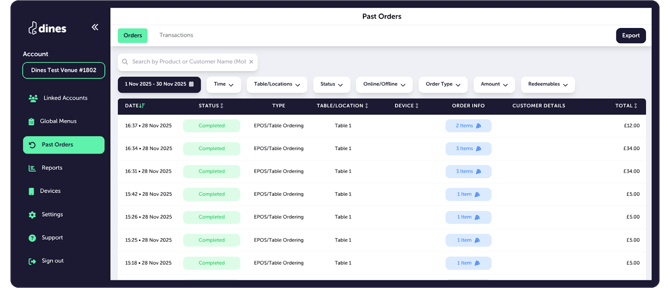
This tab is largely similar to the Past Orders tab on the regular Dines Partner Dashboard. For a full breakdown of order statuses and features, please see our article on Past Orders.
The key difference is that on the Organisation Dashboard, you can choose which linked account’s Past Orders to view. This is done via the account selector at the top-left (on the screenshot above showing as “Dines Test Venue #1802”). When you click there, you can easily switch between accounts.
Reports
As with Past Orders above, the Reports section also functions very similarly to the reports you’ll see on the Partner Dashboard, for which you can find an in-depth guide here.
The key difference in the Organisation Dashboard is that, of course, you can run reports across multiple linked accounts. Take the Gross & Net Sales Summary report (below) for example. Here, you’ll see all of the reporting functions and filters you’re used to, as described in the Advanced Reporting article above. But also, there is a “Venue” filter.
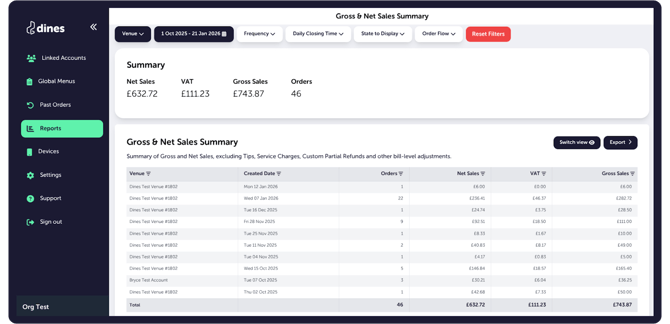
By using this, you can choose to see data only for one account, or several at the same time. Simply select the accounts you want to include and select “Apply” to update the report.
Please note: When reporting across a large number of venues, and/or a wide date range, reports may take slightly longer to load.
Devices
The Devices section will show all iPads and iPhones that have been used on the child accounts linked to your Organisation Dashboard. Here, you can see a breakdown of important information about the devices themselves.
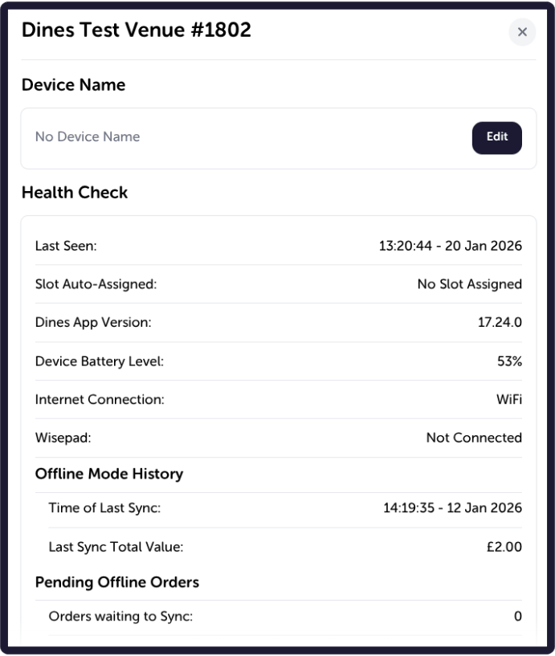
Many of the sections on the list will be self-explanatory, but just in case, here’s a brief breakdown of what everything means.
HEALTH CHECK
Last Seen: The last time the device was active.
Slot Auto-Assigned: Whether the device has “Auto-Select Location” enabled within it’s Functions (⚙) menu.
Dines App Version: The version of the Dines For Venues App currently installed on the device.
Device Battery Level: The last reported battery % from the device.
Internet Connection: Whether the device is online, or offline.
Wisepad: Whether a WisePad 3 Card Reader is connected to the device.
Time of Last Sync: When offline transactions were last synced from the device.
Last Sync Total Value: The total value of all orders that were synced.
Orders Waiting to Sync: Determines whether there is a queue of offline orders that are waiting to sync.
Value of Pending Orders: The total value of offline orders that are waiting to sync.
DETAILED DEVICE INFO
Slot Auto-Assigned: Whether the device has “Auto-Select Location” enabled within it’s Functions (⚙) menu.
Active Staff Profile: The staff member currently logged onto the device via their four-digit PIN.
Custom Menu: States whether a Device-Specific Menu is applied, much like Global Menus mentioned above.
iOS Version: The version of iOS currently running on the device.
Device Type: Whether the device is an iPhone or an iPad.
Device Model: The specific model of device, e.g., iPad 9th Gen, iPhone 17th Gen.
Battery and Power: Determines whether the device is currently on charge.
Device Battery Level: The last reported battery % from the device.
Bluetooth: Whether Bluetooth enabled or disabled on the device (note: Bluetooth is necessary for the WisePad 3 card reader to connect).
Display Mode: This will be either Light Mode or Dark Mode, depending on the device preference.
Power Mode: Determines whether the device is on regular “Normal” Power Mode, or Low Power Mode due to a low battery.
All of the above should give you a good picture of how each device is currently functioning, without having to be physically next to the device to check.
Settings
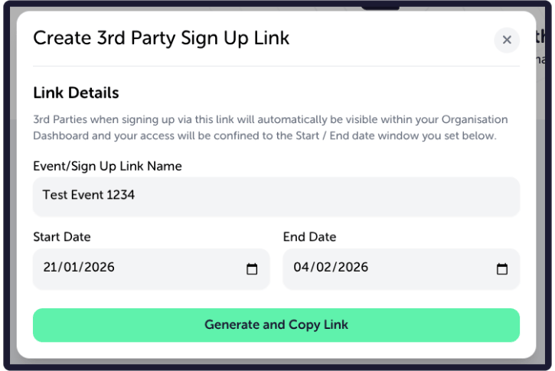
In Settings, you can create 3rd Party sign-up links. 3rd Party sign-up links allow new accounts to be created and automatically linked to your Organisation Dashboard.
Please note: this is only to be used for accounts that have not yet been created.
To create a sign-up link;
- Enter a name for the Sign-Up Link, e.g., “Test Fest 2026,”
- Set the start and end dates for access
- Select “Generate and Copy Link”
The link will then be automatically copied to your clipboard, and you can share it with a venue or trader so they can create their account. Once sign-up is complete, the new account will automatically appear in your Organisation Dashboard.
If you would like an existing account to be included in your Organisation Dashboard, please get in touch, citing the account name, email address and PIN code. We will happily link it up for you.
And that’s everything! Thank you for reading through our guide on Organisation Accounts. If you have any questions or feedback at all, or if there is a particular Knowledge Base article you’d like to see, please get in touch. You can reach us via email at care@dines.co.uk, or use our Live Chat and WhatsApp support services by clicking here.