Allergy Alerts
On this page
The basics
Allergy Alerts
Allergy Alerts is a feature which helps servers identify and accommodate customers with food & drink allergies.
If a customer has disclosed a specific allergy, Allergy Alerts allow the server to flag this on Dines EPOS. Then, if the server adds an Item or Modifier which contains this allergen, a warning will appear on their screen to alert them of a potential issue.
Let’s explore this more in the guide below.

Setting up
Activating Allergy Alerts
To activate an Allergy Alert; Head to EPOS on the Dines App. Above “Pay Now” and “Send Order,” you will see a button called “Allergies.”

After clicking on it, you will find a checkbox for various allergens. These cover the 14 reportable allergens along with the other most common allergies.

Simply select the relevant allergy, and as long as you’ve set up allergens for your items (more on that below), an allergy alert will appear under each item if it contains an offending ingredient.

As a final check, a pop-up message will appear before processing the order, prompting the server to double-check everything is OK with the customer.

The server can then go back and edit the order, or proceed with the customer’s blessing.
Menu setup
How To Add Allergens To Items
In order for Allergy Alerts to be effective, you must tag your menu Items and Modifiers with allergens. This is a quick and easy job, and can be achieved by navigating to Admin > Manage Inventory on the Dines app, or Inventory if you are logged onto Dines on a computer.
Here, you will see a list of your categories and items.
On the right-hand side of your items, there is an ellipsis button. Click on this and choose “edit item.”

This will take you to the Item page. As you scroll down, you’ll notice an option labelled “Allergens” on the right-hand side. Click on it to reveal a list of all the allergens you can tag your item with.

Select the allergens that your item contains, tap “Save” at the bottom, and you’re done! Now, Allergy Alerts will alert your servers when an order containing this item could go against a customer’s declared allergy.
Check out the gif below to see every step in practice.

Menu setup
How To Add Allergens To Modifers
To add Allergens to Modifiers, you should follow the same steps as above until you find yourself on your Item’s page.
When on the Item page, navigate to “Modifier Sets” at the top of the page, and choose the Set which your Modifiers are part of.
Now that you’re within the Modifier Set, navigate to the “Modifers” tab, and click on the ellipsis next to the Modifier you wish to add allergens to, and select “Edit Modifer.”
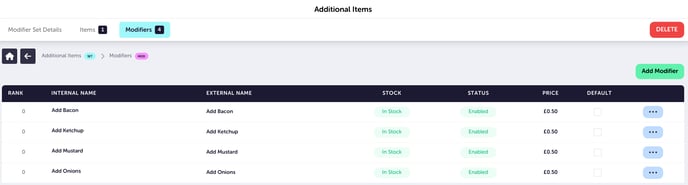
From here, it’s once again the same as adding allergens to an Item! Simply open the “Allergen” tab and choose the allergens that apply, and then hit “Save” at the bottom of your screen.
On the floor
Checking Allergens On EPOS
If a customer inquires about allergen information for an item prior to placing an order, you can easily verify this using the EPOS tab.
Pressing down on any Item or Modifier will open a pop-up menu. On this menu, you will notice a “View Allergens” option. Simply tap on it, and if you’ve previously configured the Item or Modifiers’s allergens in the Inventory (as directed above), you’ll see a list of the allergens associated with it.

On the floor
Allergy Alerts On Tables View
Allergy Alerts can also be found on Tables View, should you ever wish to double-check which tables have customers with allergies.
To identify which tables have Allergy Alerts active, click on “Tables” at the top of EPOS. This will open up a page containing the areas and tables in your restaurant. Tables with active Allergy Alerts will be clearly highlighted with a distinctive pink outline for easy identification.

Our development team are working on further updates for Allergy Alerts, meaning that more features will be coming soon.
If you have any questions or feedback, or a Knowledge Base article you would like to see, please get in touch.
